Speaker Removal in the
Mitsubishi 3000GT/Dodge Stealth
by Jeff Lucius
Overview
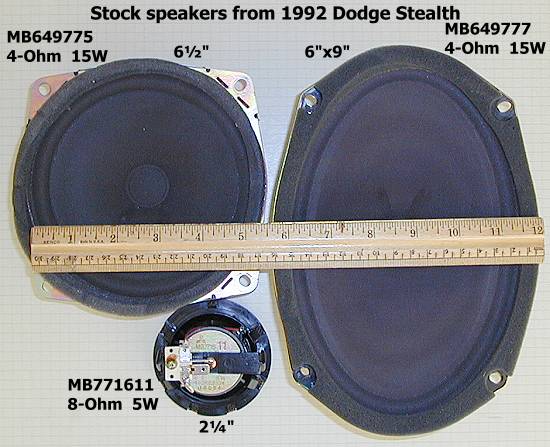
This note describes the stock speakers used in the "Ultimate Sound System", a 100-watt sound system installed by the factory in 1992 Dodge Stealth and Mitsubishi 3000GT cars. Four interior trim panels must be removed to get to the speakers. I have detailed instructions for removing these panels. For the door speakers, look at my door panel removal instructions at 2-door-panel.htm. For the rear speakers, look at my quarter trim panel removal instructions at 2-qtr-panel.htm. The only tool needed to remove the door and rear speakers is a #2 Phillips screwdrivers. The front speaker just snaps in and out. Two wires attach to each speaker using blade connectors arranged in an "L" or "T" pattern inside of a larger plastic connector.
Removal
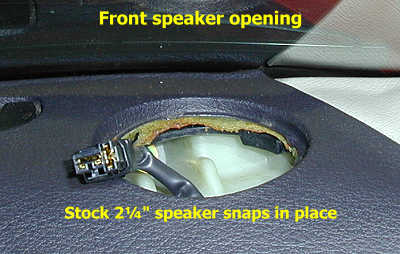
1. Front speakers. The front speakers just snap in and out. A slotted screwdriver or similar tool can be used if necessary. The speaker is integrated with its mounting bracket and cover. I have not found any aftermarket speaker that will directly replace the stock front speaker. If you have an aftermarket speaker that works well as a replacement, please send an email to website at stealth316 dot com and I will add that information to this web page.
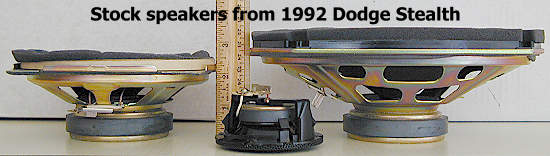
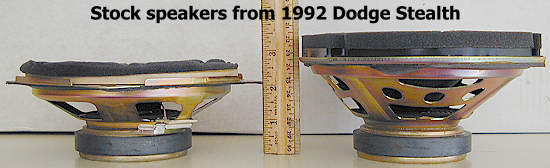
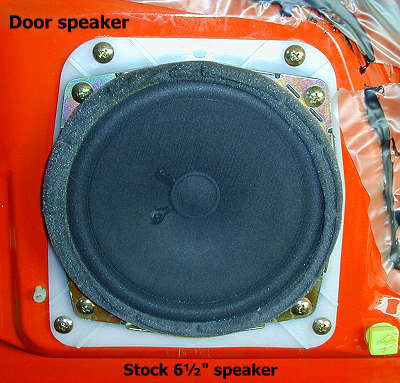
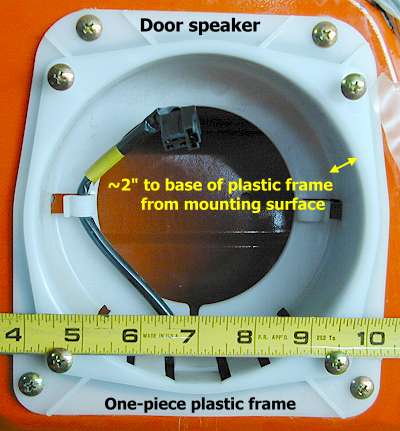
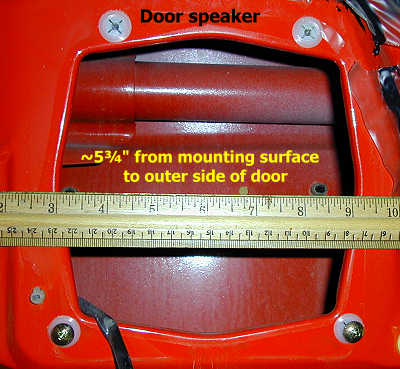
2. Door speakers. Remove the door trim panels to gain access to the door speakers (instructions are at 2-door-panel.htm). Each door speaker is attached with 4 brass screws to a one-piece plastic holder that is attached by 4 other brass screws to the door metal frame. A ruler is included in some of the pictures below to determine the dimensions of the speaker, its bolt pattern, and its holder. If the holder is removed, a larger speaker could be mounted with some minor modification to the door frame. There is considerable room (about 5¾ inches) inside the door frame to mount a larger aftermarket speaker and its case or holder. The door speakers are "top mount" speakers and have a 2-inch mounting depth with about a 5¼-inch cutout diameter. They protrude about ½-inch above the mounting surface.
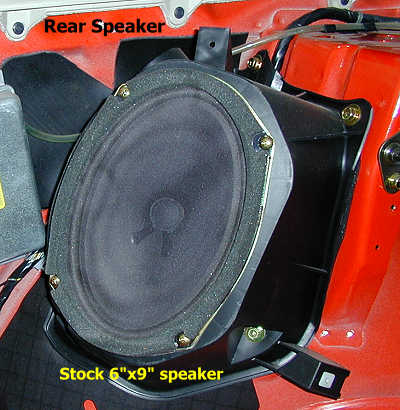
3. Rear speakers. Remove the quarter trim panels to gain access to the rear speakers (instructions are at 2-qtr-panel.htm). Each rear speaker is attached with 4 screws to a ported plastic box that is attached to the car body. A ruler is included in some of the pictures below to determine the dimensions of the speaker, its bolt pattern, and its mounting box. The rear 6"x9" speakers are "top mount" speakers and have a 2-5/8-inch mounting depth. Including the foam padding, they protrude about ¾-inch above the mounting surface.
Stewert Miles informed me that his 1992 Stealth ES had 6.5" speakers mounted in the rear enclosures, with the same mounting holes as used in the door. He was able to mount 6"x9" speakers in back by modifying the enclosure with a hacksaw.
Installation
For installation, just reverse the steps above.

Page last updated November 14, 2004.