Defroster Garnish Repair
on the Mitsubishi 3000GT/Dodge Stealth
by Jeff Lucius
Introduction
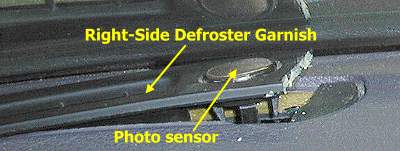
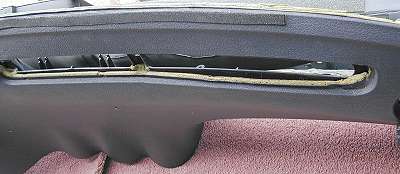
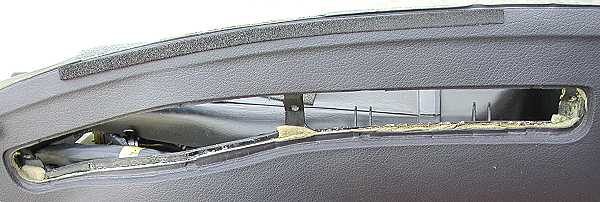
The picture below shows a common site on many, if not most, Mitsubishi 3000GT and Dodge Stealth dashes. One or both defroster garnishes has cracked. The right hand garnish seems to crack most often and right next to the photo sensor. The photo sensor, by the way, tells the full-auto air conditioner control unit when the outside light intensity is greater than 100,000 lux, or when it is "sunny out".
The original manuals would have you believe the solution is to just buy the $21 part ($17 at Tallahassee Mitsubishi) and snap the old one out and snap the new one in, as the picture below shows from the 1991 and 1992 manuals.
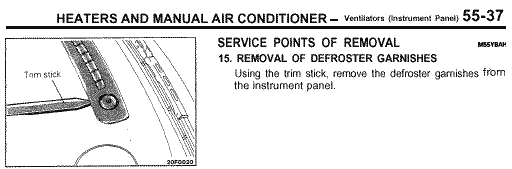 Nothing could be farther from the truth. This fanciful illustration was removed from later service manuals. The defroster garnishes screw into the dash, from underneath. The dash (or instrument panel) must be removed first! I have instructions for this at 2-dashpanel.htm. Once you have the dash out of the car, then the instructions and tips below will help you replace the garnishes and maybe delay (if not prevent) their cracking again. Be sure to keep the screws together for each piece in a bag or container so they don't get lost.
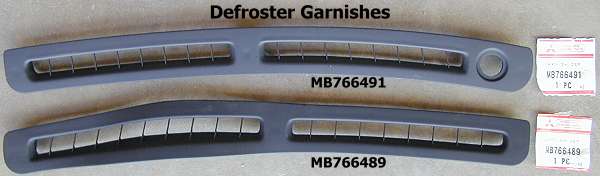
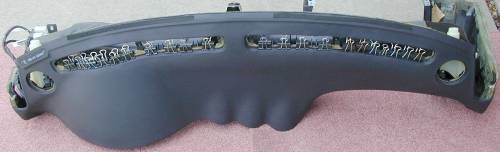
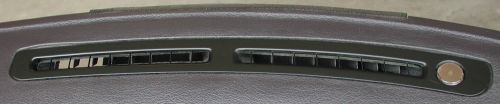
Here are what two new garnishes look like.
Removal
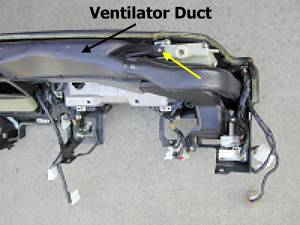
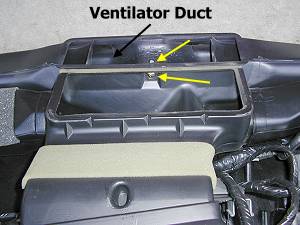
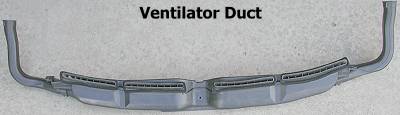
1. Ventilator duct. One piece of ventilator duct needs to be removed first. There is a #2 Phillips screw at each end and two #2 Phillips screws in the middle. The one that is "underneath" and screws into the duct you are removing is the longer one of the set.
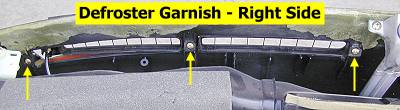
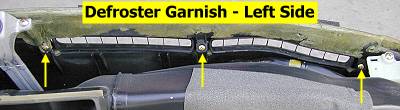
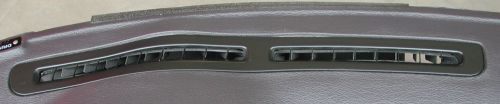
2. Defroster Garnish. Remove the three #2 Phillips screws (shown in the pictures below) from each piece of garnish. For the right-side piece, disconnect the photo sensor electrical connector and pop out the photo sensor. Remove the garnishes.
While They Are Out of the Dash
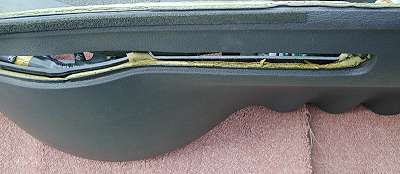
When I removed the garnishes, I noticed that the dash cover had separated around the garnish opening. The new garnishes would not sit flush with the openings because the dash cover was pushing them up. I think that part of the problem we have with the garnishes breaking is the cover separating and exerting an upward force on the garnish. This, compounded with an inherently poor design (strength-wise) of the garnish, and heat stress contribute to the problem.
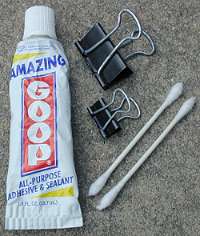
I used a product called "Amazing Goop" to repair the cover. "Q-Tips" worked as applicators. Binder clips held the cover together for 24 hours while the adhesive dried. Whatever adhesive you use, first test it on a small area to see if it works.

Installation
1. Defroster garnish. For the right-side garnish, insert the photo sensor and reconnect its electrical connector. Insert the garnishes and attach with three screws each.
2. Ventilator duct. Re-install the ventilator duct. Be sure the openings are correctly insterted into the adjoining pieces.
Page last updated March 17, 2002.