Autometer 3363 Fuel Pressure Sensor Installation
in a Mitsubishi 3000GT/Dodge Stealth
by Jeff Lucius
This web page shows some ideas for installing fuel pressure sensors. It does not include how to install the gauges or their electronics or their electrical connections. A fuel pressure gauge must be installed between the fuel filter and the fuel pressure regulator (FPR). The best place would be at the 1/8 NPT port on an aftermarket FPR or between the rear fuel rail and an aftermarket FPR. Another good place would be at the crossover pipe between rails. However, there is little room here to do this. The third place, and the one with the most room, is after the fuel filter.
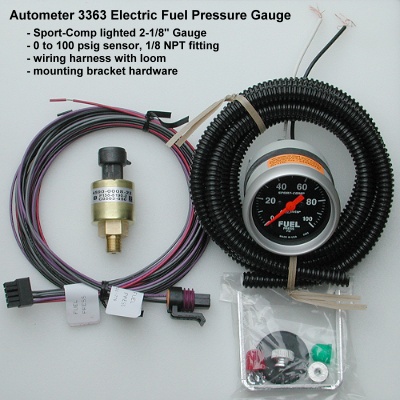
Autometer 3363 Electric Fuel Pressure Sensor and Gauge
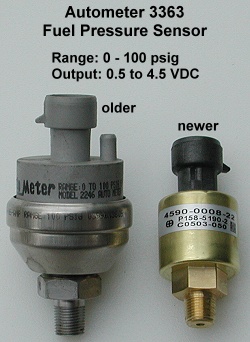
I found http://www.egauges.com/ to have the best online prices for AutoMeter gauges. In April 2003, I paid $185.90 (includes shipping) for the AutoMeter 3363. The 3363 kit has changed over the years. Several years ago the kit used a larger sensor and required a separate electronic unit between the sensor and gauge. The newer kit no longer uses the intermediate control unit and uses a smaller sensor. I am guessing the electrical specifications of the newer sensor are similar to the older sensor. Both sensors use 1/8 NPT threads. The Sport-Comp gauges themselves are not interchangeable.
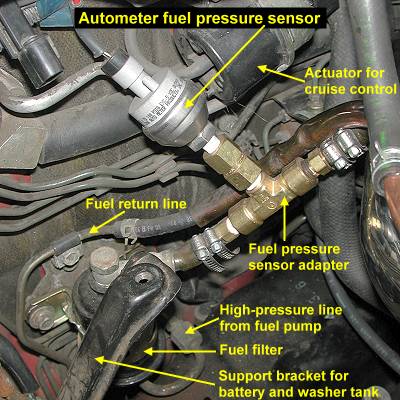
After the fuel filter with the factory hose
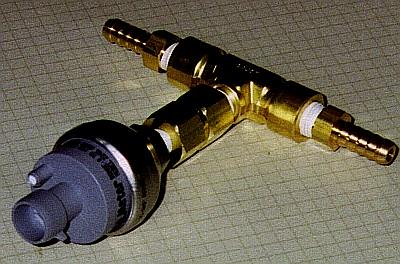
Brass fittings
- One 1/8" NPT to 1/4" NPT hex reducing coupler F-F (fits to sender and T)
- One 1/4" NPT Branch T with F-M-F (fits to barbs and reducer)
- Two 5/16" Hose barbs with 1/4" NPT male fitting (fits to fuel hoses and T)
Installation of sensor
- Assemble fittings to fuel pressure sensor. Wrap teflon tape around all threads about 2 times or use a thread sealant. Be careful to keep tape or sealant about 1/16 inch or so from the end of threads so tape or sealant does not get inside of the fittings.
- Unplug the fuel pump and try starting the car to relieve fuel line pressure.
- Remove battery and battery tray.
- Slide the washer bottle out of the way.
- Place the sensor with fittings next to the fuel supply line (not the return line) to check for location.
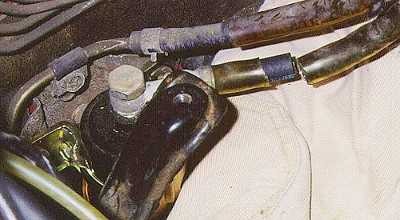
- Place a rag beneath the line and cut the supply line (the one coming out of the top of the filter) about 2 inches and 6 inches away from the fuel filter. NOTE: these locations depend on the size of the adapter fittings you bought.
- Slide 2 hose clamps onto each piece of fuel hose.
- Slide barb fittings into hoses and tighten clamps.
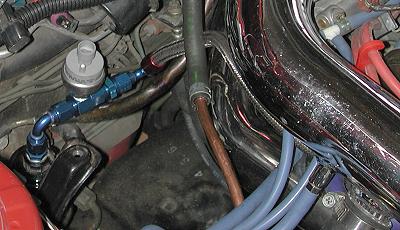
After the fuel filter with an upgraded hose
See my web page 2-fuelsupline.htm for more information.

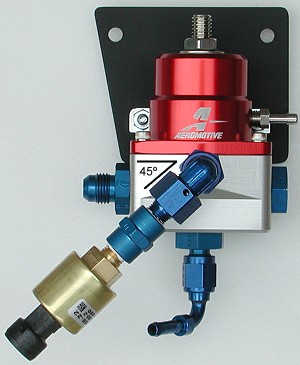
At an aftermarket FPR
See my web page 2-fpr_upgrade.htm for more information.
Pressure test.
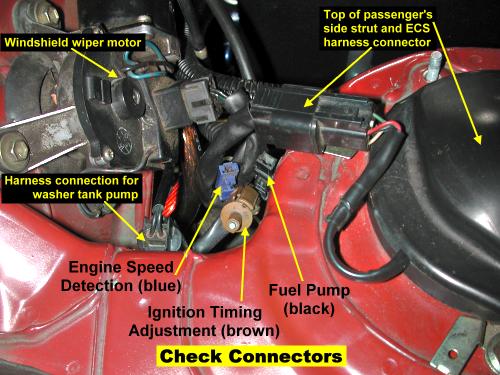
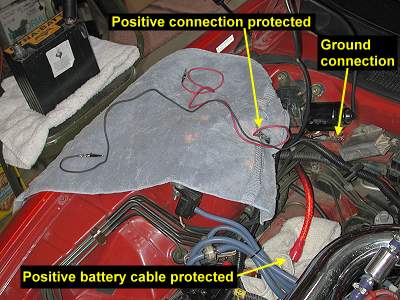
Double check that all the fuel lines are connected up. Re-connect the harness connector at the fuel pump in the rear storage compartment. Use the fuel pump check terminal to supply voltage to the fuel pump to pressurize the lines before starting the engine. If your battery was installed in the engine bay, bring it over close to the engine, perhaps sitting it on a table, bench, or chair. Remove the cap from the fuel pump check connector and insert a small paper clip. Connect a small-gauge jumper wire (14 to 18 ga is fine) with alligator clips on the end to the paper clip and to the positive battery terminal (or just touch the jumper wire to the battery positive terminal). Be sure you protect the positive cables from contacting the car body or anything metallic in the engine bay. Use a car jumper cable to connect the negative battery terminal to either the negative battery post or other good ground location in the engine bay. You should hear the fuel pump running. Carefully inspect your work for leaks - look and smell. Repair or rebuild any connection that leaks and repeat this test.
If your battery has been moved to the rear compartment or you have re-wired the fuel pump directly to the battery, you will have to connect the battery to the positive and negative cables in the engine bay or rear compartment so that the fuel pump has current to it. You will still need to connect the fuel pump check connector as described above. Because my battery is in the rear compartment, I used my old Dyna-Batt to supply current to the check connector as shown in the lower picture below. If you do not have a spare battery and the battery is in the rear compartment, you will need to run a long jumper wire to the fuel pump check connector.
Except for the small gif and jpg images, the content, images, photographs, text, and multimedia displayed are Copyright ©2000-2002 by Jeff Lucius and K2 Software. All rights reserved. No part, section, image, photo, article, or whole of this site may be reposted or redisplayed without permission of the author.
Page last updated May 18, 2002.